
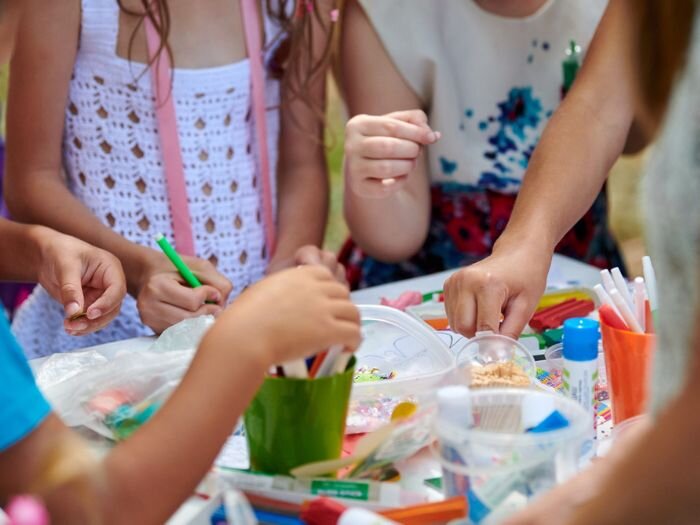
 With long days and plenty of sunshine, there's no better way to spend quality time together than diving into some summer and fall crafts.
We have many kids' craft ideas that use materials you likely already have at home. These crafts include painting, decorating, assembling, and playing with the creations.
So gather your supplies and prepare to embark on a summer and fall filled with creativity and fun with these amazing crafts for kids!
With long days and plenty of sunshine, there's no better way to spend quality time together than diving into some summer and fall crafts.
We have many kids' craft ideas that use materials you likely already have at home. These crafts include painting, decorating, assembling, and playing with the creations.
So gather your supplies and prepare to embark on a summer and fall filled with creativity and fun with these amazing crafts for kids!
4 Kid Crafts Using Household Supplies
Paper Plate Animals

Materials:
- Paper plates
- Paint
- Markers
- Glue
- Scissors
- Construction paper or colored paper
Optional Materials:
- Googly eyes
- Cotton balls or yarn (for additional texture/details)
- Glitter or stickers (for decoration)
Instructions:
- Prepare your workspace: Lay down paper or a tablecloth to protect your work surface from paint and glue.
- Paint the base:
- Choose an animal you want to create (e.g., lion, panda, cat).
- Paint the paper plate to resemble the animal's primary colors (e.g., yellow for a lion, black and white for a panda).
- Allow the paint to dry completely.
- Add details with markers:
- Use markers to draw the animal's facial features like eyes, nose, mouth, and whiskers.
- For a lion, you can draw a mane around the edge of the plate. For a panda, draw black circles around the eyes.
- Cut and attach additional features:
- Cut out ears, tails, wings, or other body parts from construction or colored paper.
- For a lion, cut out small triangles for ears and glue them to the top of the plate. For a bird, cut out wings and glue them to the sides.
- Glue all the additional features onto the painted paper plate.
- Check that everything is securely attached and allow the glue to dry.
- Display your creation: Once everything is dry, display your paper plate animals around your home or use them for imaginative play.
Tips:
- For extra details, use cotton balls for a fluffy tail or yarn for whiskers and glue them onto the paper plate.
- For extra decorations, attach googly eyes for a more animated look, or decorate with glitter, stickers, or other embellishments to make your animal unique.
- Experiment with different animals and colors to create a zoo of paper plate animals.
- Encourage kids to come up with their own animal designs and features.
Handprint Fish

Materials:
- Construction paper
- Paint
- Markers
- Paintbrushes
Optional Materials:
- Scissors
- Googly eyes
- Glue
- Glitter or stickers (for decoration)
Instructions:
- Prepare your workspace: Lay down paper or a tablecloth to protect your work surface from paint and glue.
- Create the handprint fish:
- Choose the paint color for your fish.
- Apply a generous layer of paint to your child's hand using a paintbrush.
- Make sure the hand is fully covered with paint for a clear handprint.
- Press your child's hand firmly onto a piece of construction paper to make the handprint.
- Lift the hand carefully to avoid smudging.
- Repeat the process to create multiple handprint fish, using different paint colors if desired.
- Allow the paint to dry: Let the handprints dry completely before moving on to the next step.
- Add googly eyes and details: Use markers to draw on fins, scales, and tails. The fingers of the handprint can be the fins, and you can draw scales along the palm area.
- Display your handprint fish: Once all the glue and decorations are dry, display your handprint fish artwork.
Tips:
- Glue a googly eye onto each handprint fish for a fun, animate element.
- You can add decorations by cutting out small shapes from construction paper or adding glitter or stickers to the fish for extra sparkle and fun.
- Create an underwater scene by using blue construction paper as the background. Draw seaweed, bubbles, and other underwater elements, or add cut-out shapes from construction paper.
- Encourage your child to experiment with different hand positions to create various fish shapes and sizes.
Popsicle Stick Picture Frames

Materials:
- Popsicle sticks
- Paint
- Paintbrushes
- Glue
- Markers
- Construction paper or cardboard
- Photo or drawing
- Scissors
Optional Materials:
- Decorative items (e.g., stickers, glitter, buttons, beads, washi tape)
- Clear sealant or Mod Podge (for added durability)
Instructions:
- Prepare your workspace: Lay down paper or a tablecloth to protect your work surface from paint and glue.
- Decorate the popsicle sticks:
- Let your kids paint the popsicle sticks in various colors.
- Allow the painted sticks to dry completely.
- Once dry, use markers to add additional designs, patterns, or details.
- Assemble the picture frame:
- Decide on the size and shape of the frame (square or rectangular).
- Lay the popsicle sticks flat to form the desired frame shape. Typically, you will need four sticks for a basic frame, but you can double up for a thicker frame.
- Apply glue to the ends of the sticks where they will connect. Use craft glue or hot glue (with adult supervision) for a quicker bond.
- Press the sticks together and hold them in place until the glue sets. Allow the frame to dry completely.
- Create the backing:
- Cut a piece of construction paper or cardboard slightly smaller than the frame. This will serve as the backing for the photo or drawing.
- Glue the backing onto the back of the popsicle stick frame, leaving one side open to insert the photo or drawing.
- Insert the photo or drawing: Once the frame and backing are completely dry, insert a photo or drawing into the frame through the open side.
- Display the picture frame: You can display the finished picture frame on a table, wall, or fridge using a small stand, adhesive strips, or magnets.
Tips:
- Add decorative elements like stickers, glitter, buttons, beads, or washi tape. Glue or stick these decorations onto the frame as desired.
- Add clear sealant or Mod Podge over the frame and let it dry for added durability.
- Experiment with different frame shapes, such as hexagons or triangles.
- Use themed decorations based on the photo or drawing, like beach-themed items for a vacation photo.
DIY Watercolor Paints*

Materials:
- Baking soda
- Cornstarch
- Vinegar
- Food coloring
- Small containers (e.g., ice cube trays or muffin tins)
- Measuring spoons
- Mixing bowl
- Spoon or whisk for mixing
- Toothpicks or small sticks (for stirring colors)
Instructions:
- Prepare your workspace: Lay down paper or a tablecloth to protect your work surface from spills.
- Mix the base ingredients:
- In a mixing bowl, combine 4 tablespoons of baking soda and 2 tablespoons of cornstarch.
- Gradually add 1 tablespoon of vinegar to the dry ingredients. The mixture will fizz slightly; stir continuously until you achieve a smooth paste.
- Divide the mixture: Spoon the mixture into small containers. Ice cube trays or muffin tins work well for this.
- Add food coloring:
- Add a few drops of food coloring to each container. Use different colors for variety.
- Stir each container with a toothpick or small stick until the color is evenly distributed and vibrant. Adjust the amount of food coloring to achieve the desired intensity.
- Allow the paints to dry: Place the containers in a safe, dry area and let the paints dry completely (this typically takes overnight).
- Use the homemade watercolors: To use the watercolor paints, dip a wet paintbrush into the dried paint and apply it to paper as you would with store-bought watercolors.
Tips:
- For more vibrant colors, add extra drops of food coloring.
- Experiment with mixing colors to create new shades before the paints dry.
- Store the dried watercolors in an airtight container to keep them fresh and prevent crumbling.
- Encourage kids to label their homemade watercolor sets with the color names or create a color chart.
5 Fun Outdoor Kid Crafts
Check out Bird-Watching Activities for Kids and Farm Activities for Toddlers for additional outdoor summer and fall activities.Nature Collage

Materials:
- Leaves, flowers, twigs*
- Glue
- Construction paper
- Scissors
Optional Materials:
- Markers, crayons, or colored pencils
- Glitter, stickers, or other embellishments
Instructions:
- Collect natural items:
- Plan a nature walk with your kids in a nearby park, garden, or backyard. Bring a small bag or basket to collect natural items.
- Gather materials such as leaves, flowers, twigs, small stones, and seeds. Encourage kids to choose different shapes, sizes, and colors for variety.
- Remind kids to collect only fallen items and not to pick living plants.
- Prepare the workspace:
- Lay down paper or a tablecloth to protect your work surface from glue.
- Provide each child with a piece of construction paper as the base for their collage.
- Plan the collage:
- Before gluing anything down, arrange the collected items on the construction paper. Experiment with different layouts to see what looks best.
- Consider creating patterns, scenes, or abstract designs.
- Secure the items:
- Begin gluing the items onto the construction paper. Apply a generous amount of glue to each piece to ensure it sticks well.
- Hold each item for a few seconds to allow the glue to set. For heavier items like pebbles, use a stronger adhesive or double-sided tape.
- Allow to dry: Let the collage dry completely.
- Display the artwork: Once dry, display the nature collage or frame it to preserve the artwork.
Tips:
- Use markers, crayons, or colored pencils to add finishing touches to the collage.
- Add glitter, stickers, or other embellishments for extra sparkle and texture.
- Use the collage activity to teach kids about different plants and natural materials.
- For a themed collage, focus on specific items, such as flowers or beach finds.
Rock Painting

Materials:
- Smooth rocks
- Acrylic paint*
- Paintbrushes
- Water cup
- Paper towels or rags (for drying brushes)
Optional Materials:
- Permanent markers, paint pens, or fine-tipped brushes (for designs)
- Glitter, googly eyes, or other decorative items
- Clear acrylic spray or brush-on sealer*
Instructions:
- Gather and prepare the rocks:
- You can collect smooth, flat rocks from your yard or a nearby park or purchase them from a craft store.
- Clean the rocks thoroughly with soap and water to remove dirt or debris. Let them dry completely before painting.
- Set up your workspace:
- Lay down paper, a tablecloth, or an old sheet to protect your work surface from paint.
- Arrange your painting supplies within easy reach, including paint, brushes, water cups, and paper towels.
- Plan your designs:
- Decide on the designs you want to paint on the rocks. Consider animals, mandalas, flowers, inspirational words, or abstract patterns.
- Sketch your design lightly on the rock with a pencil if desired.
- Paint the rocks:
- Start by applying a base coat of acrylic paint if you want a solid background color. Let it dry before adding details.
- Allow each layer of paint to dry before adding more details or additional colors to prevent smudging.
- Add finishing touches: Once your design is complete and the paint is dry, add details with permanent markers or fine-tipped brushes.
- Display or gift your painted rocks:
- Use the painted rocks to decorate your garden, flower pots, or outdoor spaces.
- These painted rocks also make wonderful, personalized gifts for family and friends.
Tips:
- Enhance your designs with glitter, googly eyes, or other decorative items. Attach these with glue and let them dry.
- Apply a clear acrylic sealer to protect your artwork and make it weather-resistant.
- Encourage creativity by mixing colors to create custom shades and unique designs.
- Consider organizing a rock painting party or group activity for added fun and socializing.
DIY Kites

Materials:
- Paper (lightweight but sturdy, such as construction paper or kite paper)
- Straws or lightweight wooden sticks (e.g., bamboo skewers)
- Markers, crayons, or colored pencils
- String
- Tape
- Scissors
Optional Materials:
- Ribbons or streamers
- Glue
Instructions:
- Prepare your workspace: Lay down paper or a tablecloth to protect your work surface from markers and tape residue.
- Cut the kite shape:
- Fold a piece of paper in half.
- Now draw a diagonal line from the folded edge's bottom corner to the open edge's top corner to create a triangle shape.
- Cut along the line and unfold the paper to reveal a diamond shape. Check that the kite is symmetrical for better flight stability.
- Decorate the kite: Use markers, crayons, or colored pencils to decorate your kite with bright colors, patterns, and designs.
- Reinforce the kite:
- Lay the diamond-shaped paper flat and place a straw or stick along the center line from the top to the bottom point of the diamond.
- Tape the straw or stick to the paper, checking that it is centered and extends slightly beyond the paper for added strength.
- Place another straw or stick horizontally across the widest part of the diamond, creating a cross shape. Tape it securely in place.
- Attach the string:
- Cut a piece of string to the desired length for flying the kite. A longer string allows the kite to fly higher.
- Tie one end of the string to the intersection of the straws or sticks (the center point of the kite). Verify the knot is secure, and reinforce it with tape if needed.
- Test and adjust:
- Take your kite outside on a breezy day. Hold the string and run with the kite to help it catch the wind.
- If the kite doesn't fly well, adjust the balance by moving the attachment point of the string or adding a longer tail.
- Now go fly your kite!
Tips:
- Use tape or glue to attach ribbons or streamers to the bottom of the kite for a tail. The tail helps stabilize the kite in flight.
- Experiment with kites of different sizes and shapes to see which flies best.
- Use lightweight materials for better flight performance.
- Add multiple tails or adjust the length of the tail to improve stability.
Leaf Rubbings

Materials:
- White or light-colored paper
- Crayons
- Leaves*
Optional Materials:
- Tape
- Colored pencils or markers
- Construction paper or cardstock
Instructions:
- Collect leaves:
- Take a walk in your garden, yard, or a nearby park to collect various leaves. Look for different shapes, sizes, and textures to create interesting rubbings.
- Check that the leaves are clean and dry before using them.
- Prepare your workspace: Lay down paper or a tablecloth to protect your work surface from crayon residue.
- Prepare the leaves and paper:
- Place a leaf with the veiny side facing up on a flat surface. This side typically has more texture and will create a better rubbing.
- Lay a piece of paper over the leaf. Make sure it is centered and covers the entire leaf.
- Create the leaf rubbing:
- Hold the paper and leaf steady with one hand. Use a small piece of tape to secure the leaf and paper to prevent shifting (if needed).
- Take a crayon and remove the paper wrapper. Using the side of the crayon, gently rub over the paper where the leaf is located.
- Apply even pressure and move the crayon back and forth until the leaf's shape, veins, and texture appear on the paper. Experiment with different colors to make the rubbing more vibrant.
- Repeat the process, creating multiple rubbings on the same or separate sheets of paper.
- Try overlapping leaves or creating patterns for a more artistic effect.
- Display the artwork:
- Display the finished leaf rubbings on a bulletin board, refrigerator, or in frames.
- Consider creating a nature journal with the rubbings and notes about each leaf.
Tips:
- Use colored pencils or markers to add details, labels, or backgrounds to your leaf rubbings.
- Cut out the rubbings and mount them on construction paper or cardstock for a framed look.
- Choose fresh leaves that are not too dry or brittle to create better rubbings.
- Experiment with different paper and crayon colors to see what works best.
Sponge Water Bombs
Materials:
- Sponges (about 2-3 sponges per water bomb)
- Rubber bands
- Scissors
- Bucket or container
Instructions:
- Cut the sponges:
- Use scissors to cut each sponge lengthwise into strips. Aim for strips about 1 inch wide for a good balance of flexibility and absorbency.
- Depending on the size of the sponge, you should get about 3-4 strips per sponge.
- Bundle the sponge strips:
- Take 9-12 sponge strips and stack them together, mixing colors for a fun look. Check that they’re evenly aligned.
- Hold the bundle tightly in the middle. Wrap a rubber band around the center of the bundle several times until it is tight and secure.
- The tighter the rubber band, the more the sponge strips fan out, creating a ball-like shape.
- Adjust the sponge strips (if needed) so they’re evenly distributed around the rubber band. Fluff them out to create a round, pom-pom-like shape.
- Enjoy the water games:
- Fill a bucket or container with water. Soak the sponge water bombs in the bucket until saturated.
- Toss them around like water balloons, have a sponge bomb fight, or create target games.
Tips:
- Make several sponge water bombs in different colors to keep the games exciting.
- Use a large bucket or container to keep the sponge bombs soaked and ready for play.
- Consider having a designated area for the water games to keep the fun contained and avoid slippery surfaces.
- These sponge water bombs are reusable, eco-friendly, and safe for all ages.
3 Recycled Materials Summer Crafts
Tin Can Planters

Materials:
- Empty tin cans
- Acrylic paint
- Paintbrushes or sponges
- Hammer and nail
- Seeds or small plants
- Soil
Optional Materials:
- Primer (for better paint adhesion)
- Clear sealant (to protect the paint)
- Decorative items (stickers, ribbons, washi tape)
Instructions:
- Prepare the tin cans:
- Clean the empty tin cans thoroughly with soap and water. Remove any labels and adhesive residue. Let the cans dry entirely.
- Use a hammer and nail to carefully punch a few drainage holes in the bottom of each can. This will help prevent water from accumulating and causing root rot.
- Paint and decorate the cans:
- Let your kids paint and decorate the cans with their favorite colors and designs.
- Allow the paint to dry completely.
- Fill the cans with soil:
- Once the paint and decorations are dry, fill each can with potting soil.
- Leave about an inch of space at the top to prevent overflow when watering.
- Plant the seeds or small plants:
- Plant your chosen seeds or small plants in the soil. Follow the planting instructions specific to the type of plant or seed you are using.
- Lightly water the soil to help settle it around the plants or seeds.
- Place the planters: The tin can planters can be placed on windowsills, in the garden, or in any other suitable location where they can receive adequate sunlight.
Tips:
- For better paint adhesion, apply a coat of primer to the outside of the cans and allow it to dry according to the instructions.
- Apply a clear sealant to protect the paint and make the planters more durable.
- Add stickers, ribbons, or washi tape. Let your kids get creative and personalize their planters.
- Choose appropriate plants or seeds for the amount of sunlight available where you plan to place the planters. Read Plant A Garden Without A Greenthumb for more tips!
Egg Carton Critters

Materials:
- Cardboard or foam egg cartons
- Paint
- Paintbrushes or sponges
- Googly eyes
- Pipe cleaners
- Glue
- Scissors
Optional Materials:
- Markers, glitter, stickers, or other decorative items
Instructions:
- Prepare the workspace: Lay down paper or a tablecloth to protect your work surface from paint and glue.
- Cut the egg carton:
- Use scissors to cut the egg carton cups apart. Each cup will form the body of a critter.
- You can cut or keep individual cups in small clusters for creatures like caterpillars.
- Paint the egg carton cups:
- Let your child paint the egg carton cups in various colors. Encourage them to use their imagination and creativity to create vibrant critters.
- Allow the paint to dry completely.
- Add googly eyes:
- Once the paint is dry, glue googly eyes onto the egg carton cups to give your critters faces.
- Depending on the type of critter, you can use one or multiple eyes.
- Create legs and antennae:
- Cut pipe cleaners into different lengths for legs and antennae.
- For legs, bend the pipe cleaners into "L" or "U" shapes and glue them to the sides or bottom of the egg carton cups.
- For antennae, bend the pipe cleaners into desired shapes and glue them to the top of the critters' heads.
- Display or play: Once all the glue is dry, your egg carton critters are ready to be displayed or used for imaginative play.
Tips:
- Use markers, glitter, stickers, or other decorative items to add details and personality to your critters. Let your child get creative and make each critter unique.
- Use egg cartons of different sizes and shapes to create a variety of critters.
- Experiment with different painting techniques, such as sponging or splattering, for interesting effects.
- Combine multiple egg carton cups to create longer critters like caterpillars or centipedes.
Egg Carton Flowers

Materials:
- Cardboard or foam egg cartons
- Paint
- Paintbrushes or sponges
- Pipe cleaners (green for stems)
- Scissors
- Glue
- Toothpick or skewer
Optional Materials:
- Markers, glitter, stickers, or other decorative items
Instructions:
- Prepare the workspace: Lay down paper or a tablecloth to protect your work surface from paint and glue.
- Cut the egg carton:
- Use scissors to cut the individual cups from the egg carton. Each cup will become a flower.
- Trim the edges of each cup to resemble flower petals. For different flower styles, you can cut simple, rounded petals or more intricate shapes.
- Paint the flower cups:
- Let your child paint the egg carton cups in bright, vibrant colors. Encourage them to use their imagination to create a variety of flowers.
- Allow the paint to dry completely.
- Attach the stems:
- Once the paint is dry, use a toothpick or skewer to poke a small hole in the bottom center of each flower cup.
- Insert one end of a green pipe cleaner through the hole to serve as the stem. Pull it through until a small portion is inside the cup.
- Bend the small portion inside the cup and secure it with a dab of glue to keep the stem in place. Allow the glue to dry completely.
- Display the flowers:
- Arrange the finished egg carton flowers in a vase or use them in craft projects.
- They can also decorate gift packages, create flower garlands, or make a colorful centerpiece.
Tips:
- Use markers, glitter, stickers, or other items to add details to the flower petals.
- Use different sizes and shapes of egg carton cups to create various flower types.
- Experiment with different painting techniques for interesting effects, such as sponging or blending colors.
- Combine multiple flowers to create bouquets or wreaths.
Unleash Your Child's Creativity
Embrace the joy of crafting and make this summer and fall one filled with creativity, laughter, and memories. Remember to visit your local Wilco Farm Store for any additional supplies you might need. Happy crafting!Orders
Services
About
Your Wilco Store

Store Hours
Monday to Saturday:
8 a.m. to 8 p.m.
Sunday: 9 a.m. to 6 p.m.

Need Help?
For questions or help with online orders call: (888) 78-WILCO
Limited to stock on hand. Some items may vary from photos. Because of store size limitations or geography, some items featured may not be available in all stores but will be made available by special order during sale periods at advertised prices. All sale prices listed as “dollars off” or “% off” are discounted from our regular posted shelf price, not from discounts given with specialty, bulk or pallet pricing. Reseller and Drop-shippers must contact us for pre-approval to place orders with the intent to re-distribute.
© 2025, Wilco Farm Store